Version 3.6
- June 2011: Version 3.6
- May 2011: Version 3.6
- April 2011: Version 3.6
- March 2011: Version 3.6
- February 2011: Version 3.6
- January 2011: Version 3.6
June 2011: Version 3.6
Package Image Clips
Image clips now save correctly when packaging your show allowing you to easily take the images to other computers.Fixed Page Width
You can now fix the page width to set the number of clips per page. This ensures that when changing page the clip alignment is not lost. The options are Dynamic, 100 and 255 clips. The 255 clip option is specifically useful when controlling via DMX as it ensures that each page fits on a DMX channel. This is configured in the Screen Monkey Settings.Pixel Mapper DMX Merge
The pixel mapper can now merge its DMX output with another universe. This allows mixed control of the fixture between the pixel mapper and a lighting console. The merge is only supported through the Pixel Map XML at this point.Page Up and Down
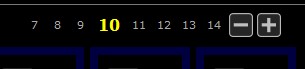
Some major improvements have been added to the page navigation to help you get to the correct page faster. You still have the page up add down buttons with the go to page by clicking on the current page number. However in addition you will see the next and previous four page numbers which you can click on to jump straight to that page.
Page Bookmarks
With a large show containing many clips it can be difficult to find the page containing the clip you want. Page bookmarks make it much faster to find the correct page by allowing you to bookmark and name your most commonly used pages. Click here for a step-by-step process for using Bookmarks.
CITP/DMX Pages
The CITP interaction now reports the clips in pages with the bookmarked name appearing as the page name. This makes it much easier to select clips via DMX as it categories the clips.Pixel Mapper DMX Address
The pixel mapper DMX address now indexes from 1 and not zero to make it more consistent with other DMX applications. The ArtNet universe still indexes from zero.ArtNet Output Display
You can now see in the ArtNet settings all DMX outputs as well as inputs. The outputs are assigned by the PIxel Mapper but the output list is a useful tool to ensure everything is setup correctly.
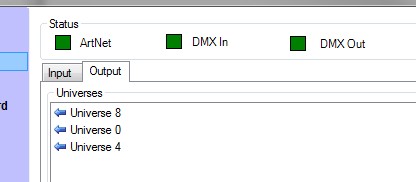
A new "DMX Out" indicator shows that everything is working correctly.
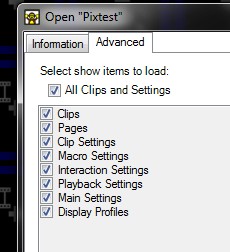
Load Show Select All
When loading a saved show, this option makes it easy to load not just the clips but also all the settings stored in the show. When you select this option everything including all settings are loaded and existing settings will be lost.
M2V and M4V Video Files
The video clip now supports M2Vand M4V video file extensions.Dmx Zoom, PanX and PanY
You can now use DMX to control the magnification and position of a clip within a layer. This does not change the layer size but does allow you to zoom in on a clip which is being displayed on a layer.Song Clip Search Focus
The search entry is now focused when you add a song clip. This makes it simpler to quickly search for existing songs.Lock Pixel Map Group
A pixel map group can now be locked to prevent the cells being accidentally changed. To lock a group, right-click on the group and select "Lock Cells".Pixel Mapper Fixture Library
A fixture library is now included with Pixel Mapper to help you get started.
 Back to top
May 2011: Version 3.6
Swap Media
This is a new clip option that applies to any clips which play files stored on your system. It allows you to change the file the clip references. So you can change to a different video file or image. It is specifically handy when copy and pasting clips as the settings are maintained but the file can be changed. To swap the video file of a clip, right-click on the clip and select "Swap Media".
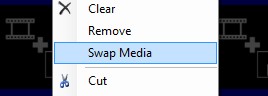
You will now need to select the video file you want to swap with the existing video. Once finished the clip will play the new video file.
FFDShow Decoder Preference
It is now possible to specify that when playing video it should choose the ffdshow decoder over other installed decoders. For greater video format support and reliability it is recommended that you choose this option. It is only if you are experiencing problems playing videos that you may choose to change this setting. To turn on the option, right-click a video clip and choose "Video Options".
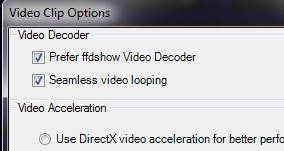
The setting is global, so once set, it will apply to all video clips.
RS232 Macro
This macro allows you to send serial commands via the RS232 port on your computer. Click here for more information.
TCP Macro
This macro allows you to send TCP commands over a network for the control of other devices. Click here for more information.
Schedule Clip Dialog displays Clip Name
The schedule clip dialog now displays the clip name in the header to remind you which clip you are editing.AAC Audio Files
The audio clip now supports audio files in AAC format.DMX Colour Control
You can now control the brightness, contrast, red, green and blue of each layer through DMX.Random Clip Link
When you link a clip you can now choose to link to a Random clip.
Back to top
April 2011: Version 3.6
Pair Clip
You can now pair two clips together so if one plays the other also plays on another layer. Click here for more information on linking.
Image Clip JPEG Extension
The image clip now recognizes the file extension JPEG as well as .JPG.Video Clip Volume Fixed
The volume control of a video clip had no effect when live. This has now been fixed.Foreign Character Sets in Songs
Added support for foreign character sets when saving songs.Shows Saved in Multiple Instances
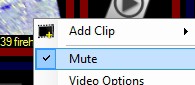
A show that has been saved in one instance will now load into any instance.Audio Mute
A new option has been added to clips with audio to mute the clip. The option appears in the clip context menu if it supports it.
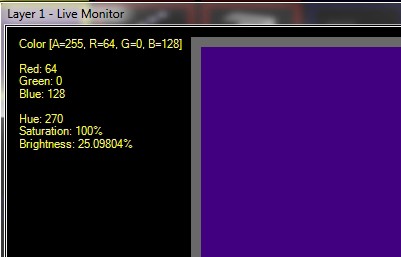
Colour Clip Live Monitor
The live monitor for the color clip shows you information about the color being displayed on the screen. This helps in prompting you to know what the live output is on that layer.
Back to top
March 2011: Version 3.6
Interaction Macro
This macro allows you to add Screen Monkey controls to the clip slots. Click here for more on Interaction Macro.
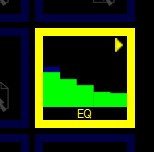
Audio EQ
This is a new shape type within the effects generator that allows you to write effects which respond to a live audio input. The eq looking effect will respond to signals through the line in of your computer and animate in time to the music. To get started add the EQ effect by adding a new Effect Generator clip and selecting EQ from the library. You can customize the effect to your precise needs.
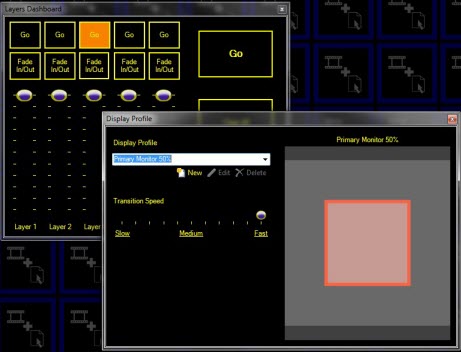
Separate Layer and Display Dashboards
The layers dashboard and display profiles dashboard are now two distinct windows you give you more flexibility. The display dashboard has also been simplified to make it easier to use and select the correct display.
Fade All Layers from Layer Dashboard
few extra buttons have been added to the layers dashboard to control all the layers together.
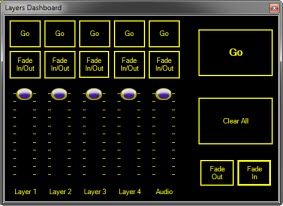 |
Go |
Performs a go on the active layer |
Clear All |
Clears all the layers | |
Fade Out |
Fades out all the layers together | |
Fade In |
Fades in all the layers together |
Schedule Clip Dashboard
The schedule dashboard makes it easy to see which clips you have scheduled to play and check on the running order. You open the dashboard by clicking on the clock icon in the main tools menu.

The dashboard contains a list of clips which are scheduled to play, the current live clip and the next clip which is scheduled. A count down shows you exactly how long until the next scheduled item.
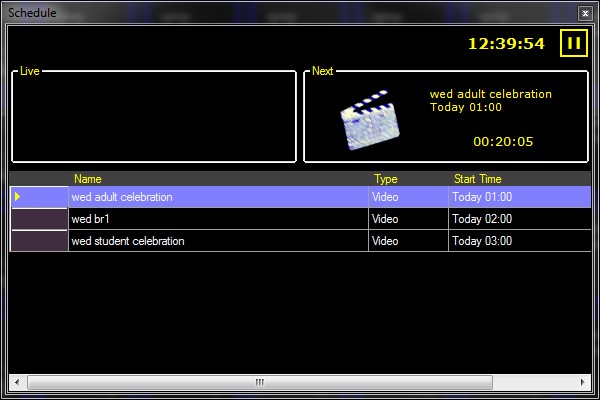
Next to the current time you will notice a pause button. This allows you to pause the scheduler and prevent the next clip from running. When the scheduler is paused the button turns red.
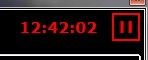
When you un-pause the scheduler it will continue by playing the next scheduled item.
Double Click to Play
A new user setting allows you to specify whether a user must double click the mouse to play a clip. The default is for a single click to play the clip but to avoid accidents you may want to specify double click.Multi-edit in Space
The spaces clip list now allows multi select so you can edit many clips at once. This makes for much faster working when editing many clips at once. To select multiple rows, click on the row header and drag the mouse over the clips you want to select. Also supports Ctrl and Shift selection modifiers.Sort Spaces by Schedule Time
You can now sort the spaces list by schedule time.Last Link Time Fill
When you specify a new timed link it automatically fills in the link time with the last used time. This can make it easier when specifying timed links with the same time.
Back to top
February 2011: Version 3.6
- Snakes
A new type of shape has been added to the effects generator which creates a snakes effect.
Back to top
January 2011: Version 3.6
Transitions and Effects
In previous versions transitions were called effects. Transitions now specify how two clips transition between each other. The new effects are applied to an individual clip and allow you to change the properties of that clip for the duration of its playback. Click here to learn more about Effects.
Macros
Macros allow you to combine actions or commands into your existing show. Click here for more information on Macros.
Shell Macro
The shell macro allows you to run windows shell commands from within Screen Monkey. Click here for more information on Shell Macros.
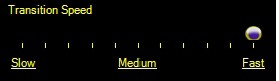
Layer Transition Speed (Fast, Medium and Slow Shortcuts)
To make it quicker and easier to change the transition speed of the display profile three speed shortcuts have been added.
CITP Update Message
The CITP interaction now supports the layer update message so clients are informed of any changes to your show.
Back to top