Version 3.7
- October 2011: Version 3.7
- December 2011: Version 3.7
- January 2012: Version 3.7
- February 2012: Version 3.7
- March 2012: Version 3.7
- July 2012: Version 3.7
October 2011: Version 3.7
Streaming ACN (Pro Feature)
Added support for streaming ACN between a lighting console or other control device and Screen Monkey. This allows DMX to be sent over a network. For you to use this, your lighting console must also support Streaming ACN. The control channels follow the standard DMX control channels as detailed in the Screen Monkey manual.
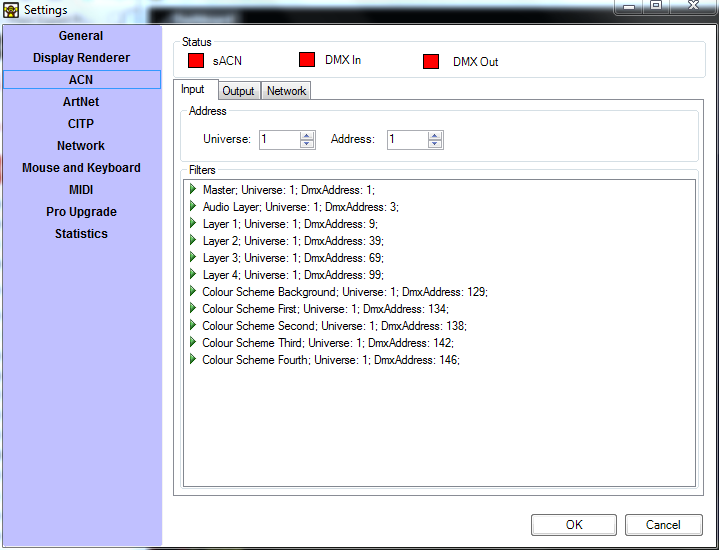
You can configure the Streaming ACN universe from the ACN tab in the settings. You will also see other options here such as an indicator to tell you if you are receiving DMX and the ability to disable certain layers from Streaming ACN control.RDM (Pro Feature)
RDM was developed by the lighting industry to allow discovery and control of lighting fixtures over DMX. It is also applicable to Screen Monkey as it allows lighting consoles to discover Screen Monkey and tell what universe it is receiving DMX on and what personality to use to control the software. The RDM support is currently only over ArtNet but will be added to ACN soon.
With RDM support you will be able to use features such as auto address and identify from lighting consoles that also support RDM. This simplifies the process of patching and configuring with a lighting console.
The following RDM messages are supported along with mandatory messages.
Device Information
Device Model Description
Manufacturer Label
Software Version Label
Device Model Description
Dmx Personality
Dmx Personality Description
Device Hours
Lamp Hours
Lamp Strikes Hours
Clear Page Bookmarks on New Show
The page bookmarks are now cleared when you start a new show. Before the bookmarks would be left from the previous show.Fixed Page Sizes
A new user setting allows you to configure fixed page sizes. This can make it simpler when laying out your show as it ensures that the first item on page 2 is always the first item. Previously, the page sizes would change to fit the Window size. If the items on a single page exceed the number that can be displayed, a scroll bar appears.
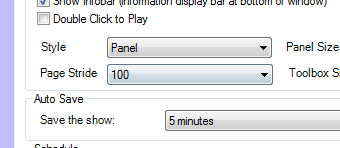
From the settings you can select a number of different page sizes. If you are controlling via DMX then the page size is automatically set to 255 clips per page to make it easier to control.SmNet Clip Control (Pro Feature)
Added much greater support to SmNet for control of your clips over a network. The most notable change is the addition of clip events that notify a remote client when a clip is played or deleted as well as other state notifications.
The networking interfaces have been condensed into the ScreenMonkey.Net.dll and all you have to do to control Screen Monkey over a network is reference this assembly. For more information about developing SmNet applications please visit http://screenmonkey.codeplex.com.
Other SmNet additions in this version:Layer Opacity Control
Layer Volume Control
Bookmarks and Pages
Clip Play State
Load SMX and SMZ files over the network
December 2011: Version 3.7
MIDI Macro (Pro Feature)
The MIDI macro allows you to send MIDI commands from Screen Monkey for the control of other devices.

Using the macro you can schedule or link macro commands in your show to give greater integration between your video and other devices.
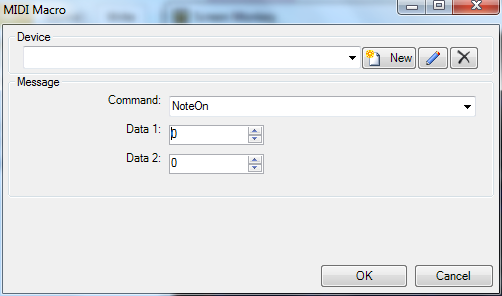
Included is support for all standard MIDI commands and any number of MIDI devices can be connected.Song Clip High CPU
Fixed bug where song clips with no transition would require a large amount of CPU to display.
 Back
to top
January 2012: Version 3.7
Select Network Adapter (Pro Feature)
You can now select which network adapter is used for ArtNet and ACN traffic.
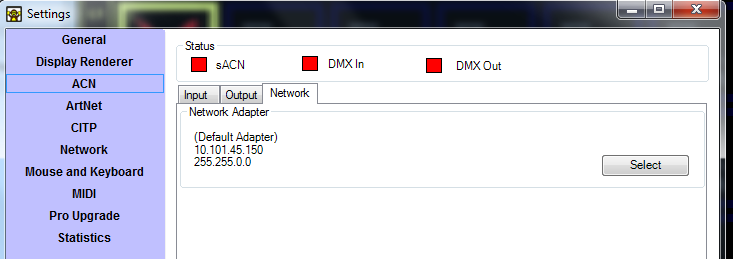
Go to settings and select either the ArtNet or ACN tab. Click the Network tab and click Select to change the adapter. The currently selected adapter will be displayed.Grass Valley Triton Router Macro (Pro Feature)
The Triton Routing Macro allows you to control any Grass Valley Triton router through the Screen Monkey software. Using the macro you can configure the audio and video cross-points separately or together. This allows you to incorporate video switching into any Screen Monkey show.

The router must be connected via a RS232 port and any number of connected routers is supported.
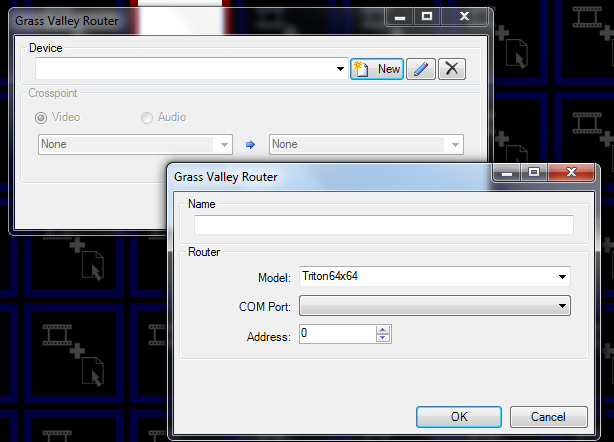
As well as controlling the router, the macro also supports feedback from the router and will indicate the selected cross-points even when changed from the router's hardware switches.LightwaveRF Macro (Pro Feature)
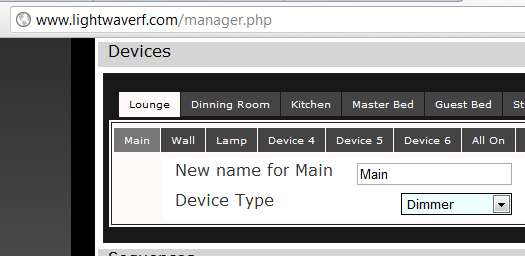
Lightwave RF is a home lighting automation control protocol which allows control of light dimmers, relays and socket power. Its applications go beyond home use and could be used for raising and lowering screens or anywhere where control of low power (13A) devices is required. To use this macro you must purchased a LightwaveRF Wifi router which connects to your network with Screen Monkey.

Using this macro you can change light dimer levels, select pre-configured moods and turn 13A Sockets On and Off. A relay unit is also available.
Once you add the macro it can be incorporated into your normal Screen Monkey show. Once your command has been setup you can click on the "Try Command" button to check that everything is working.
To setup your LightwaveRf devices. please visit the LightwaveRF website.
Text Clip Objects
Your basic text clip function just got so much better. It now allows you to display a vast array of different text items on the screen and these can be added to your template along with other text items to build up an information screen that dynamically updates. Each text object you add can be styled to give you the precise layout and look you want. Click here for more on the Text Clip Objects.Schedule Dashboard 24Hour Clock
The schedule dashboard now shows a 24 hour clock instead of a 12 hour clock.

Schedule Wait For Break
You can now set the scheduler to wait for a break in the program before running a scheduled item. This ensures that the scheduler waits for the playing clip to finish before running the next item. You can choose to enable this through the settings.

Clip Schedule Indicator
Displays a click icon in all clips that are scheduled to play.

Multiple Clip Links
You can now link a clip to multiple items rather than just a single clip as before. The default as before is to link to just a single clip but if you select either "More Options" or the "Link" option from the clip menu it will allow you to specify additional links. Click here for more on this feature.Clip Templates
Using templates you can export any existing clip as a template to create new clips. The template includes all clip settings and allows you to quickly and easily duplicate the clip settings. Click here for more on Clip Templates.Links in Tooltip Text
The clip links are now displayed in the clip tooltip.

Live Audio Clip
You can use the live audio clip to play audio from any sound card input. This is useful if you want to automatically switch between live and pre-recorded content or you want to mix live audio with content from Screen Monkey. Click here for more.Macros in Space Clips
Macros now work from space clips.Schedule Clips from Schedule Dashboard
Using the schedule dashboard you can directly add clips using the Add button.
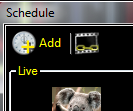
You can then select a clip and choose the schedule time to add it to the scheduler.Show Linked Clips in Scheduler
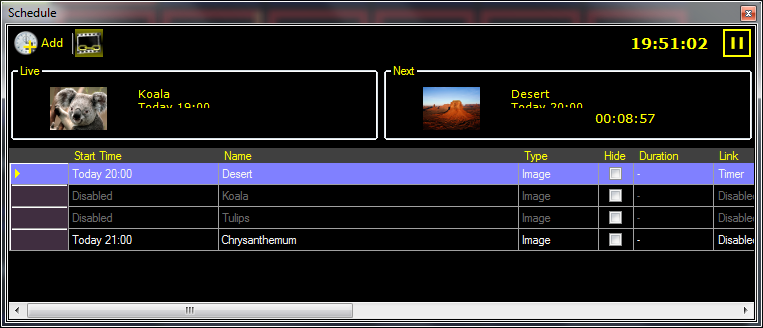
This option allows you to display any linked clips along with any scheduled items is the same schedule dashboard. This makes it easier when setting up complex scheduled shows. To display the linked clips click on the links icon.

This will show any linked clips in grey.
 Back
to top
February 2012: Version 3.7
Exempt Clip Schedule from Copy/Paste
Stopped a clip's schedule settings from being copied with copy and paste.Repair All Clips
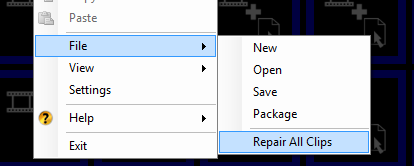
Allows you to repair all clips in a show not just a single clip. Using this function you can specify a folder path to be searched for all the media in the show. If the missing file is found it will be assigned to any broken clips. The selected folder is searched recursively for media files.
Resolved Live Video and DVD Clips on x64
You may now use Live Video and DVD clips on all x64 systems.Link Column added to Schedule Dashboard
A link column has been added to the Schedule dashboard.Search Clip
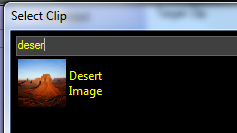
A search field has been added to the select clip dialog to make it easier to find the clip you want.
Link Clip Edit Tool
A new dashboard edit tool has been added to make it easier to create links between clips. To enter the link edit mode select the link tool from the main dashboard toolbar.

Once you enter the mode, select a clip with links.
The selected clip with links will be highlighted with a blue border. The linked clips will be highlighted with green borders and all other clips will be have gray borders.

You can now select on any clip to edit or add a link from the selected clip. The link type is shown in the clip panel.
Using this tool it is much easier to create and view complicated links.New Hotkeys Added
| Home | Goto Page 1 |
| PageUp | Next Page |
| PageDown | Previous Page |
| Ctrl + P | Playback/Live Mode |
| Ctrl + E | Edit Mode |
| Ctrl + L | Link Edit Mode |
| Alt + Right Click | Edit Links |
| Ctrl + Right Click | Edit Schedule |
Text Clip Background Image Aspect Ratio
The image background of a text clip will now obey the aspect ratio settings specified for a layer. Previously the image would always be stretched.Macros Logged in Statistics
Macro events are now logged in the statistics output along with standard media clips.User Clip Thumbnails
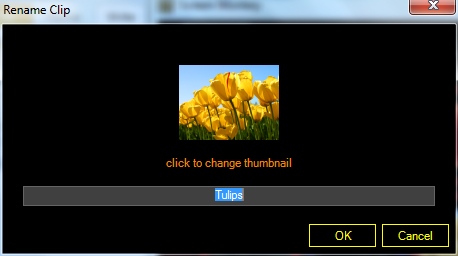
You may now add your own thumbnail images to clips rather than having to use the default images. To change the thumbnail, right click the clip and choose Rename. this will open a dialog that allows you to rename the clip and choose a clip thumbnail.
 Back
to top
March 2012: Version 3.7
Multi Line in Text Clip
You may add multiple lines to text clip items by using Shift+Enter.Fix for Web Browser on 64Bit Systems
On 64 bit systems there was previously no option for using the Web Browser clip. Version 3.7 corrects this issue.
 Back to top
July 2012: Version 3.7
New and Improved Setup
Created a new setup process to ensure Screen Monkey is always installed correctly every time.Live Stream Clip
You can use the Live Stream clip to display live video streams across the internet. Click here for more.Blackmagic DeckLink Renderer (Pro Feature)
Support has been added for the Blackmagic DeckLink Renderer. Click here for more.New Help File
The help system has experienced a major overhaul and should now be more up to date and more accurately reflect Screen Monkey functionality.Dashboard Changes
The Main Dashboard has experienced some cosmetic changes as well as some new functionality.Relative Paths
Screen Monkey has been modified so that inside the show file relative paths to the media are written. This means that when you move the show between computers Screen Monkey will be able to find the correct media files.MIDI Show Control
Screen Monkey now supports MIDI Show Control Protocol.
Click here for more via the Internet.
 Back
to top