Version 3.2
- 8th March 2009: Version 3.2
- 6th March 2009: Version 3.2
- 15th February 2009: Version 3.2
- 2nd February 2009: Version 3.2
- 20th January 2009: Version 3.2
- 5th January 2009: Version 3.2
- 29th December 2008: Version 3.2
- 24th December 2008: Version 3.2
- 14th December 2008: Version 3.2
- 6th December 2008: Version 3.2
- 27th November 2008: Version 3.2
- 16th November 2008: Version 3.2
- 10th November 2008: Version 3.2
- 9th November 2008: Version 3.2
- 7th November 2008: Version 3.2
- 26th October 2008: Version 3.2
- 18th October 2008: Version 3.2
- 13th October 2008: Version 3.2
- 10th October 2008: Version 3.2
- 9th October 2008: Version 3.2
8th March 2009: Version 3.2
Web Browser Clip
The web browser clip which was previously an optional plugin is now part of the main application.Schedule Clip Column
Added a clip schedule time column to the grid when viewing clips in the list view. When you click on the calendar button you can edit the scheduled time and date for the clip.

Link Clip Column
Added a link column to the grid when viewing clips in the list view. A drop down list can be used to set the link type.

 Back to top
6th March 2009: Version 3.2
Live Video Letterboxing
You can configure the live video to be either letterboxed to maintain aspect ratio or stretched to fit on the screen.
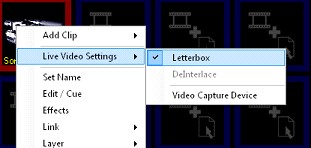
Live Video De-Interlace Options
Added options to configure the de-interlacing of live video. You can turn the interlacing on or off.
PNG Transparency Bug
Fixed bug where PNG images would lose their transparency on layers 1 and 2.Editing Display Profiles Updates Live
If you are editing the live display profile then it now updates on the screen live. This can be useful if you are setting a screen mask as it allows you to tweak it and see your changes.
 Back to top
15th February 2009: Version 3.2
Cue Window Position
The docking position of the cue window is now remembered so it opens in the same place. Each clip type has their own position.Space Clip Quick Add
You can now click on the background of the cue window to add a new clip to a space. An add clip icon on the background indicates this.
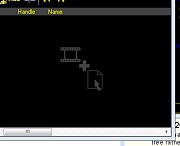
Space Clip List Open
After you have created a space clip it now automatically opens the cue window without you having to go to cue.
 Back to top
2nd February 2009: Version 3.2
Alt + Add Clip
Holding the Alt key while creating a clip will create a new space and add the clip to that space. This provides a fast and easy way to create spaces. So when you are dragging in a number of files you can easily add those files to a new space by holding down the Alt key when you drop the files.Auto Edit Spaces
When a space is created it now automatically opens the edit window so you can see the clips in the space.
 Back to top
20th January 2009: Version 3.2
Maximum Effects Speed
Increased the maximum effects speed to 20 minutes.
 Back to top
5th January 2009: Version 3.2
DVD Chapter Tree
When cueing a DVD you can now select the title and chapter from a tree rather than a drop down list. This makes it easier to find the chapter you want.
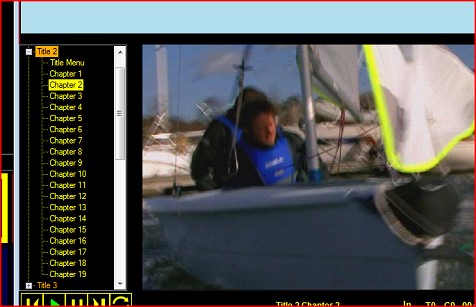
The current title and chapter is now displayed above the timecode.

Add Clip Wizard
The add clip wizard allows you to click on an empty clip slot to add a new clip. Using the new wizard you can quickly select the type of clip you want to create or choose files from which to generate a clip. Instead of right clicking you just left click on an empty space.
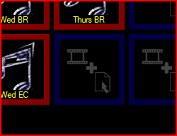
The following window will open.
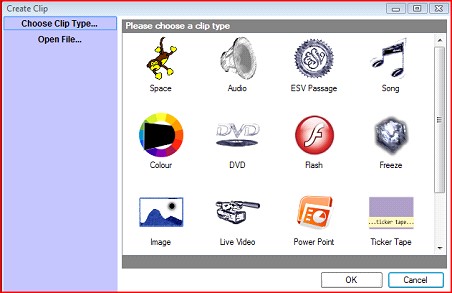
Double-click on the type of clip you want to create or select "Open File..." to choose the files you want to create clips from.
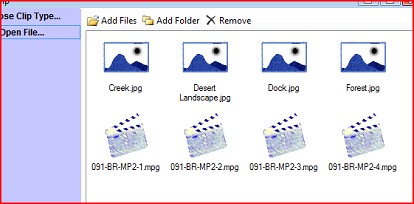
Tidied up Add Clip Popup
The list of clips in the popup menu is now under Add Clip and not in the main part of the menu.
 Back to top
29th December 2008: Version 3.2
WPF Renderer
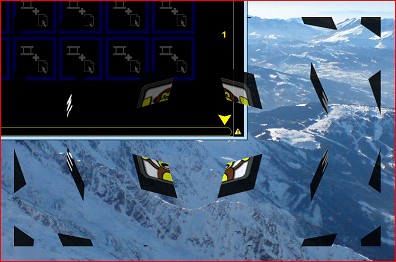
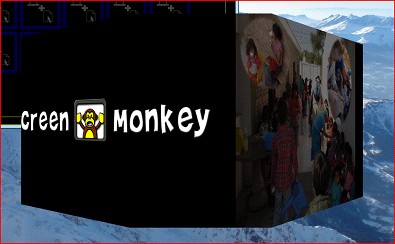
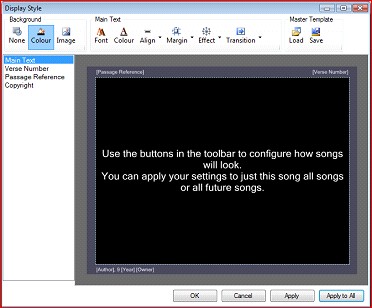
Enter the world of 3D with the WPF renderer. This renderer provides much smoother graphics along with 3D effects. The first installment only supports Image, Color, Song and Video clips but this will develop in the future. This is not the default renderer so you will need to enable it by going to settings and changing the "Display Renderer" to "WPF". Once enabled you will see the extra effects available.
Explosion
Rotate
ESV Clip Display Updated
The ESV clip now benefits from the same display framework as songs.
 Back to top
24th December 2008: Version 3.2
- Renderer
Plugin System
The rendering system which is what actually displays the clips of the screen has now been made pluginable. This opens up the way for different types of renderers which work on different operating systems. It allows the display to be easily extended and gives the user the ability to select which type of renderer to use. You can only use one renderer at a time and the user selects which renderer to use in the settings under "Display Renderer".

Version 3.2 will be released with two renderers. The Standard and a new WPF renderer.
With the WPF renderer you get the added capability of new 3D effects but this renderer does not support all clip types. Please note that when you change renderers the available effects may change.
 Back to top
14th December 2008: Version 3.2
Auto Save
This is a much requested feature as you like to have the peace of mind that should something go wrong you will not lose your work. You can now create your show in the comfort that Screen Monkey is saving your changes in the background. You have the option of changing the Auto Save period or disabling it altogether. To setup auto save you go to Settings.

ESV Clip Uses REST Interface
Updated the ESV clip to use the new ESV REST interface provided by www.esv.org. This is where it gets the words for the passages from.
 Back to top
6th December 2008: Version 3.2
Cue/Edit PowerPoint Clips
You can now edit PowerPoint clips by selecting the slides to be shown and change the transition time of each slide. This can now all be done from within PowerPoint. The edit window also offers a useful visual reference for what the PowerPoint contains as it displays all the slides and can be left open while the clip is live.
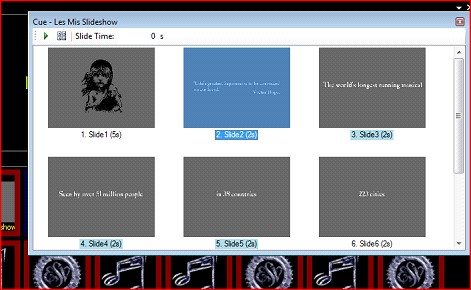
The slides that will be shown are highlighted in blue and the live slide is highlighted in yellow. You can select a range of slides and by clicking the set slide range button you will set which slides are displayed during playback. Selecting a slide and clicking play will change the live slide (if the clip is live then the live output will change). When you select a slide you can also set a transition time for the slide. When you double click on a slide it will also set the live slide.
 Back to top
27th November 2008: Version 3.2
Moved Screen MonkeySettings.XML Location
The settings file for Screen Monkey, used to be stored in the Program Files folder with the application. However when using a low privilege user account the application would be prevented from saving its settings. This file has now been moved to the Application Data folder which can be accessed by low privileged users.Hide Layer
A layer can now be permanently hidden so that it is never displayed. This is useful if you want to run audio files which have no visible output and you want to ensure the black output is never displayed. To set to hidden go to the display profile editor and set Hidden to true for the layer you want to hide.

 Back to top
16th November 2008: Version 3.2
PowerPoint Auto Start
When a PowerPoint is set to auto-transition it will start playing straight away instead of having to manually advance the first slide.Move Clip
This is a long awaited feature and has been the subject of many requests. You have setup a series of clips but they are in the wrong order. Well now you can enter edit mode (click on the pencil icon) and drag any of the clips about. You can even drag clips between a space and the main dashboard. When in list view you just highlight the clip you want to move and drag it about, no need to enter edit mode.Song Library Update
When searching for songs in a folder, if you add a new song to that folder it will now include that in the search with no need to restart the application.Song License Text
If when showing song clips you are required to show a license number (such as CCL) then you can do this by editing the song and selecting Tools > License Text from the menu. Select "Show license text" and enter the license number in the text box. This will be appended to the copyright text.
 Back to top
10th November 2008: Version 3.2
Space Clip Interactions
Two interactions are available for space clips which you can assign keyboard keys to. They are next and previous clip and change the live clip of the last space to be played.Clip List Toolbar
A toolbar in the clip list allows you to add a new clip, cue the selected clip and change the live clip for the space.

 Back to top
9th November 2008: Version 3.2
Docking Windows
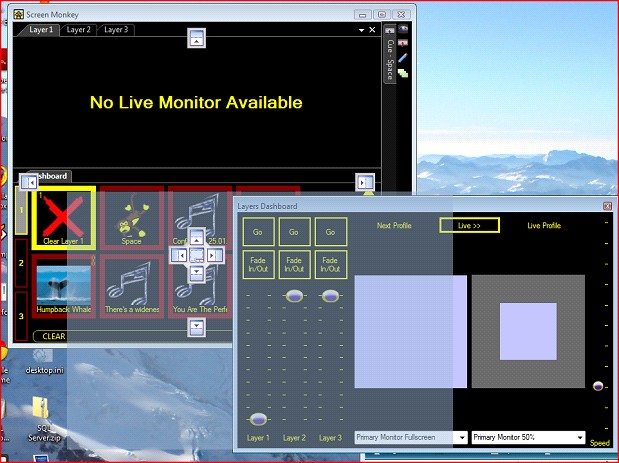
All the windows in Screen Monkey are now dockable. This offers an extremely powerful and flexible way of arranging all the different elements of the software. Where before all the windows would appear on-top of each other you can now arrange the elements in the layout you want.

To change the layout you drag the window to the position you want to move it. As you drag the window you will see guides appear indicating where you can drop the window to dock it.
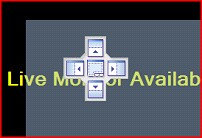
If you drag the window outside all the other windows then it will float. Dropping the window in the center of the guide will cause it to become tabbed.

To view a window that is tabbed just click on the tab to make it visible. You can also pin a window so that it is hidden but slides out when you click on the window icon. To pin a window you click on the pin icon.

Please note that the window must be docked and not tabbed to see this icon. When the window is pinned it will appear as a small button against the edge you pinned it to.

You now have a great deal of flexibility to layout the different parts of Screen Monkey, where you want them.
Space Clip Live Item Highlight
The space clip now highlights the live item in orange. This is different to the context item in purple which is the selected item you can edit or change. The live item is the clip that will be displayed when you play the space. When the space is actually live then the highlight changes to yellow.
 Back to top
7th November 2008: Version 3.2
Space Clip Next and Previous
The next and previous interactions for the space clip will now move to the next and previous clip in the list of clips in the space. To move to the next clip just click on the clip and holding shift while clicking on the clip will move to the previous clip. These keys are also definable in the settings under "Mouse and Keyboard".Mouse and Keyboard Interaction or MIDI Highlight
When in either the "Mouse and Keyboard" or the "MIDI" settings. If an action has an input such as a key press assigned to it then it will now appear in bold in the list.Mouse and Keyboard Interaction or MIDI Clear Button
A new clear button has been added to the mouse and keyboard settings to allow you to un-assign a key press from an action. To un-assign an action you select the action so it is highlighted and click on the cross button. Pressing the Delete key will also have the same effect.
 Back to top
26th October 2008: Version 3.2
Song Clip Double Line Break
Placing a double line break in a song will force the next text to be displayed on a separate slide.Cue / Edit Clip Shortcut
You can now open the cue / edit clip window by pressing the middle mouse button while the mouse pointer is over the clip you want to edit.
 Back to top
18th October 2008: Version 3.2
- Song Clip
Labels
You can now add a label to a song clip. This gives you the ability to tag similar songs with the same label and during searching you can only search for songs with a specific label. Dashboard Style
It is now possible to change the style of the main dashboard. This changes the way clips are displayed in the main dashboard. You have two options: Panel and List.
13th October 2008: Version 3.2
Flash clip link
Fixed bug where flash clips would not play when linked to with the timer.
 Back to top
10th October 2008: Version 3.2
- Space
Clip
A space clip is a clip which can store many other clips and play them back in a list form.
 Back to top
9th October 2008: Version 3.2
Command Line Arguments
A range of command line arguments can be specified when running Screen Monkey to perform certain operations. See the Command Line Arguments help topic under information for a full list of arguments and how to specify them. This feature is useful when trying to automate the software.File Associations
You can now associate supported media files with Screen Monkey and open them directly. Once you have associated the file just double click on them in explorer and they will be added to the clip library and start playing straight away. By selecting and opening multiple files you can quickly add many files for playback.
 Back to top