Understanding Layers
Layers are extremely powerful as they allow you to play up to four visual clips at the same time. They may be used to show clips on separate monitors or projectors, overlay text or images or even create a multi picture in picture effect.

The position and size of the layers is configured using the display profiles. Advanced playback controls are provided in the layers dashboard. This section will explain the principles of using layers.
Layers
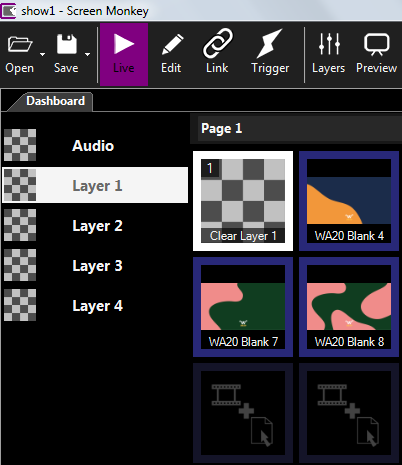
When playing a clip you have four layers to choose from. If a clip has not been specifically assigned to play on a certain layer, it will play on whatever layer happens to be active at the time it was started. You change the active layer by selecting it in the layer panel to the left of the dashboard. The active layer is indicated by the white highlight, in this example Layer 1 is active.

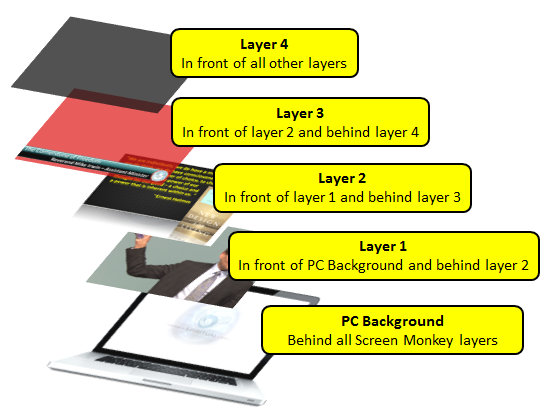
It’s important to remember that layer 4 is on top (or in front) of layer 3, layer 3 is on top (or in front) of layer 2, and layer 2 is on top (or in front) of layer 1.

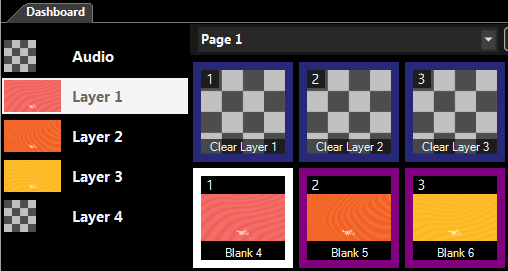
When a clip is playing on a layer that is not the active layer, its border will be purple instead of white.
Clear Layer
The first clip (top left) on every page of the dashboard is the clear active layer clip. Clicking it will always clear the active layer, and only the active layer. This clip cannot be assigned to any other layer.
To clear a clip on a different layer, you first need to set that layer as active, then click the Clear Layer clip. Alternatively create new Clear Layer clips and assign them to a specific layers as shown below.

Tip: Control-Click on a layer preview thumbnail to immediately clear the layer.
Assigning Clips to Specific Layers
To assign a clip to a specific layer so it will always play on that layer rather than the active layer right click the clip open the Layer menu and choose which layer the clip will play on.

If a clip has been assigned to play on a specific layer, the layer number it is assigned to appears in the top left corner of the clip thumbnail. The Koala clip below has been assigned to layer 2 and will always play on layer 2 regardless of the active layer setting.

Audio Layer
The audio layer is provided to play media which contains no video content such as audio MP3 or WAV files. This layer differs from the other layers in that it does not output to the screen. This means you can play audio alongside video without the audio content affecting the visual output.
When you add audio clips they are automatically assigned to this layer and will display an ‘A’ symbol in the top left of the thumbnail to indicate this. Any clip may be manually assigned to the Audio layer. When it plays, it will not present visual output.
Screen Monkey and PowerPoint
Screen Monkey has the ability to simply play PowerPoint presentations on any of its four layers. However, if you use PowerPoint natively to present on the second monitor, this provides a ‘fifth’ layer, in that you may use PowerPoint to present slides on the PC, then use Screen Monkey to present content that overlays the running PowerPoint presentation.