Version 3.3
- 2nd December 2009: Version 3.3
- 9th November 2009: Version 3.3
- 24th October 2009: Version 3.3
- 22nd October 2009: Version 3.3
- 20th October 2009: Version 3.3
- 18th October 2009: Version 3.3
- 15th October 2009: Version 3.3
- 8th October 2009: Version 3.3
- 1st October 2009: Version 3.3
- 21st September 2009: Version 3.3
- 19th September 2009: Version 3.3
- 25th August 2009: Version 3.3
- 20th August 2009: Version 3.3
- 1st August 2009: Version 3.3
- 30th July 2009: Version 3.3
- 4th July 2009: Version 3.3
- 3rd March 2009: Version 3.3
2nd December 2009: Version 3.3
Load Show Advanced
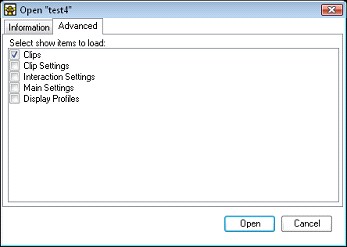
Allows you to load settings and display profiles from a saved. show. So now as well as transferring the clips between computers you can also transfer all your settings. When you load a show you are presented with a dialog telling you the show name. If you select the advanced tab then you can select which sections of a show you want to load.
 Back to top
9th November 2009: Version 3.3
Seamless Video Looping
You can now loop videos seamlessly without any pause or stutter as the video rewinds. You can now use special video lops for backgrounds to show.Seamless Audio Looping
Audio will now loop seamlessly with no gap when rewinding to the start.Audio Clip 64 Bit Support
The audio clip now works on 64bit windows platforms. Previously a bug in the .net framework meant that audio would fail when run on a 64Bit operating system.Multiple Action Triggers
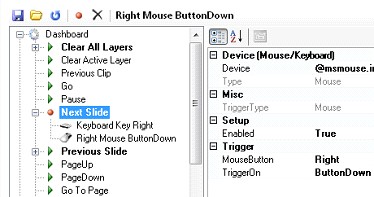
The mouse, keyboard and midi actions all now support multiple action triggers. This means you can assign more than one key to any action. This is useful when for example you want a PowerPoint slide to transition on the arrow keys as well as the next slide button on your wireless remote.
 Back to top
24th October 2009: Version 3.3
Software De-Interlacing
Added the ability to de-interlace live video using a software filter. This is used if the hardware does not support de-interlacing. If this is the case the software will appear in brackets next to the option.Fixed PowerPoint Pausing
I think I have finally fixed a long standing bug where when you have a PowerPoint running and you click on another window it pauses the PowerPoint presentation.Developer Console
A new developer console has been added to make it easier for people developing plugins. The console allows you to write debug messages using SmConsole.WriteLine() and they will appear on startup. The developer console can be shown by using the command line switch /debug.
 Back to top
22nd October 2009: Version 3.3
- Screen
Saver Clip
Added a new screen saver clip which allows you to play any of the installed Windows screen savers within Screen Monkey. Click here for more information.
 Back to top
20th October 2009: Version 3.3
ArtNet
ArtNet is an Ethernet protocol which allows lighting consoles that output DMX to stream that data over a network. The new ArtNet interaction allows lighting consoles and other ArtNet devices (such as remotes) to control Screen Monkey. Please note that this plug-in is not free and must be purchased separately for a small charge. When you first go into settings and select ArtNet you will be presented with a screen which asks you to activate the plug-in. Once the plug-in is activated you will be able to control the layer opacity, play state and select clips on each layer. This is really useful if you are controlling your show from a lighting desk and do not want to have a separate operator.
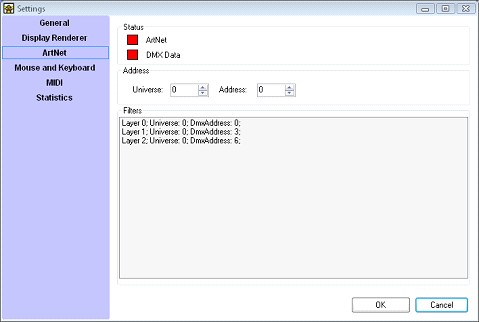
In the settings window there are two indicators, the ArtNet indicator shows whether any ArtNet is being received and the DMX Data indicator shows whether DMX is being received on the correct universe. You can also change the DMX Address and ArtNet Universe that the layers listen on. Each layer has separate control and the channel layout is shown below.
Control |
Function |
DMX Offset |
DMX Range |
Layer Opacity |
Opacity |
0 |
0-255 |
Playback |
Clear Layer |
1 |
0-2 |
Play Clip |
3-5 |
||
Pause Clip |
6-8 |
||
Clip Select |
Index / Handle |
2,3 |
0-65535 |
18th October 2009: Version 3.3
Bold Font in Song Clip
Fixed a bug where setting the font for a song clip to bold was not being saved in a show. This meant that when the software re-started it had the font you chose but not in bold.
 Back to top
15th October 2009: Version 3.3
Layer List in Profile Editor
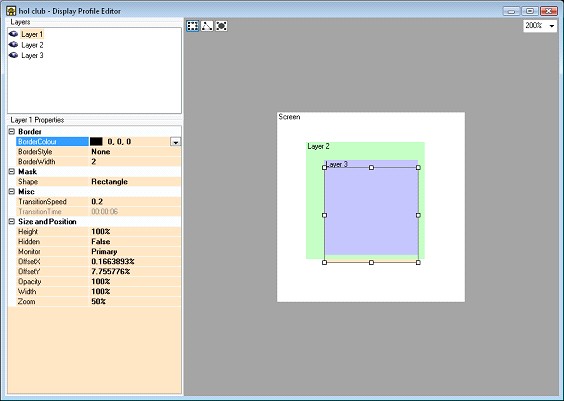
A list of layers has been added to the display profile editor to make it easy to select the layer you want to edit. It was difficult before if a layer was underneath another layer to select it and make changes. The layer list makes it simple to select a layer for editing. The layer properties changes to display the properties for the selected layer.
Hide Layers in Profile Editor
You can now toggle the visibility of a layer in the profile editor to hide layers you are not working on. This allows you to see layers beneath other layers to make changes.

 Back to top
8th October 2009: Version 3.3
Rubber Band Selection in Edit Mode
You can now select clips in edit mode by clicking and dragging the mouse to create a box inside which the clips are selected. This makes it easy to select multiple clips in edit mode using the mouse. You enter the edit mode by clicking on the edit icon in the toolbar. You can still use the Shift and Control keys to add to an existing selection.

Move Multiple Clips
You can now move all the selected clips instead of just a single clip at a time. To move a range of clips, select the clips you want to move and then drag the clips to their new location.Green Panel Border in Edit Mode
The clip panel border now turns green in edit mode to indicate that you are in edit mode and you cannot run a clip by clicking on it.Toggle Edit Mode Shortcut Key
The keyboard shortcut Ctrl+E will toggle the edit mode on and off. You can change the shortcut key under Settings > Mouse and Keyboard.Effects Clip
The effects clip allows you to generate animations with a simple scripting syntax. For those less adventurous it includes a number of presets from which you can create animated graphics to go with your presentation.

To add a new effect, click on an empty clip slot and select the Effect Generator clip type. This will open the effect library from which you can choose a number of default effects.
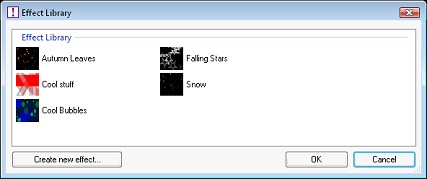
For those more adventurous you can select "Create new effect...". This will open an editor where you use a simple scripting language to create effects.
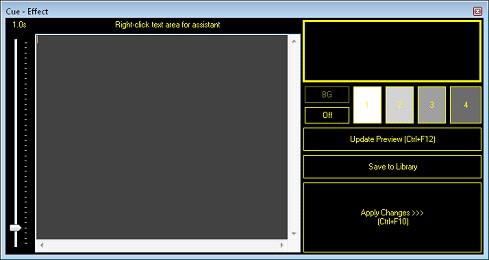
When you right click in the grey area it opens a helper dialog which will get you started creating your own effects. Also in this window is a preview window to see the effect you are creating and a speed slider to change the speed of the animation. Very quickly you can create good looking animations to put under song text or show on your screen.

 Back to top
1st October 2009: Version 3.3
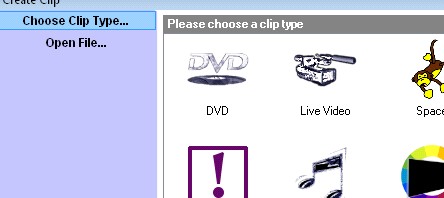
Create Clips Sorted by Last Used
The clip types when creating clips are now sorted by last used date. This means that the most recently used clips will appear first in the list.
 Back to top
21st September 2009: Version 3.3
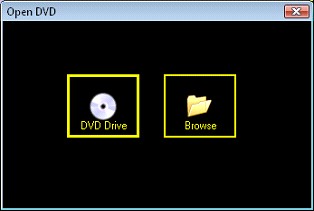
DVD Drive Quick Play
When you create a DVD clip instead of you having to browse to the DVD files it now asks you if you want to play the disc in the DVD drive. You can still select "Browse" to browse to the files as before. It makes it a lot easier for unfamiliar users to play DVD discs.
 Back to top
19th September 2009: Version 3.3
Audio Clip Play State
The audio clip now shows the play state icon in the top right of the panel.Live Video Audio Input
You can now select an audio input to use with a live video clip. If you have a live video source which also has an audio feed through the sound card you can now tie it to the live video clip. This means that the audio will be faded with the clip and so transitioning from a live source to another clip means the audio will also fade.
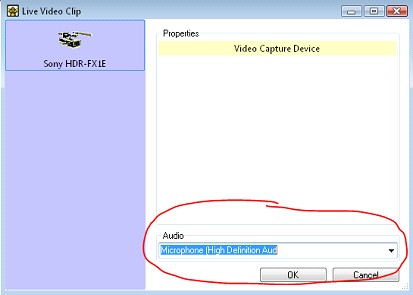
You set the audio source when creating the live video clip by selecting from the drop down list of audio devices. Just select the audio input you wish to use.
 Back to top
25th August 2009: Version 3.3
Dashboard Toolbar Single Click
In previous versions if the main dashboard toolbar containing Live Monitor, Layers Control icons would require a double click to open the windows. It now only requires a single click.View Profiles
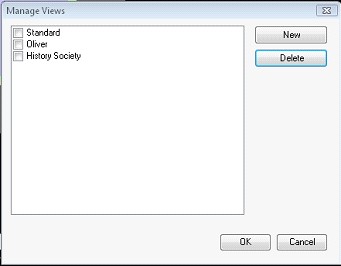
View profiles allow you to save the current window layout and state so they can be restored at a later date. This is useful if you have a default window layout which you want to go back to. To load a window layout select the layout icon and choose the state you want.
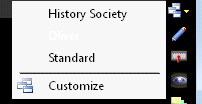
To save a layout select "Customize" and then new. This will save the current layout and will appear in the list of layouts with the name you chose.
 Back to top
20th August 2009: Version 3.3
Audio Volume Fader
Improved the smoothness of the audio clip volume fader.WMA Audio Support
Added support for WMA audio files. These can now be played by the audio clip.
 Back to top
1st August 2009: Version 3.3
MIDI Trigger Levels
The MIDI trigger level allows you to specify whether data2 is ignored or used in matching the trigger. This is useful if you want to change the behavior for different MIDI devices. If we have a MIDI trigger Command = NoteOn, data1 = 16, data2 = 32 and we get a MIDI NoteOn data1 = 16, data2 = 42. With the level set to data1 the action would be executed because the disparity in data2 is ignored. If the level was set to data2 then the action would not occur because the two data2 values are different.

Ticker Tape Settings
Each ticker tape clip can now has individual settings. Previously each clip would share settings.Custom Verse Tags
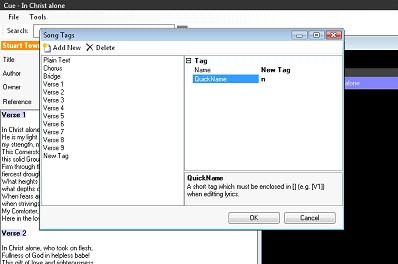
You can now add your own verse tags to use when entering songs. This allows you to customize the default tags of Verse 1-9, Chorus and Bridge. To create your own tags open the song for editing and from the Tools menu select "Song Tags". You have the option to add new tags or edit old ones.
Search Label Filter
The new song label filter allows you to narrow down the search for a specific song to only those with the label you apply. This provides an easy means to categorize your songs. You may want to apply a label such as "Christmas Songs" so you can search for only songs related to Christmas.

 Back to top
30th July 2009: Version 3.3
Song Clip Lyrics Edit Copy/Paste Popup
A popup menu has been added to the lyrics editor of a song clip. When you right click in the edit area it displays a copy and paste menu. The keyboard shortcuts Ctrl+C, Ctrl+V work as before.
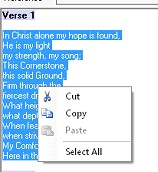
Pasting Lyrics Removes Rich Text Formatting
When you paste into the lyrics edit area it now removes any rich text formatting. Before it could be annoying if you pasted lyrics with a large font as it made it difficult to edit the song.Clip Interaction Additions
The following interaction functions have been added to the interface for developers.
- notification when a clip starts to play.
- information about a clip in the library.
4th July 2009: Version 3.3
Cue Audio Clip
The audio clip now has a cue control which allows you to specify a start and stop time for the audio clip. The play controls and timeline allow you to navigate the audio to find the in and out points you want. You then select the set In/Out point buttons to play just the clip you want. The loop button can be pressed to create an audio loop.

Audio Clip Album Art
The thumbnail in an audio clip is now automatically generated from the album art in the ID3 tag. If your MP3 contains album art in the ID3 tag then you will see that image instead of the default audio clip logo. Before it used to search the internet for a suitable image but this has been removed.
 Back to top
3rd March 2009: Version 3.3
Play Clip on Layer MIDI Command
A new MIDI command has been added to play a clip on a specified layer. The new command can be found under the layer playback group. The data1 parameter is the index of the clip to play on that layer.Cannot select DVD chapters
Fixed a bug where you could not select the DVD chapter to play from the popup menu. The only way to cue a DVD was through the cue window.
 Back to top