Working with Clips
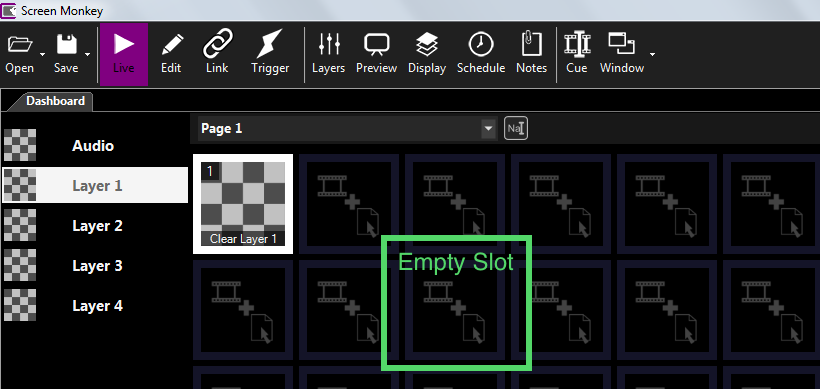
When you open Screen Monkey for the first time you will see a grid of empty squares. These squares, or slots, are used to hold the clips (images, videos, text, song words, etc) that will form your show and that you will present to the audience.
The process of adding media to Screen Monkey is achieved by creating clips. There are several ways to go about creating a clip.
Create Clips
Clips go into slots, usually one clip per slot except in the case of the special cue-list and playlist clips. There are four ways to create clips.
1. Clip Chooser
To create a new clip left-click on an empty clip slot. This slot is where your clip will be placed once it is created. The Create Clip dialog window will open. The grid of available clip types can be filtered by Media, Macro, Template, File or All by clicking the labels in the sidebar.
To quickly find a clip type or template by name you can type into the search box at the top of the grid. The grid will be filtered as you type to only show clips or templates than contain the search text.
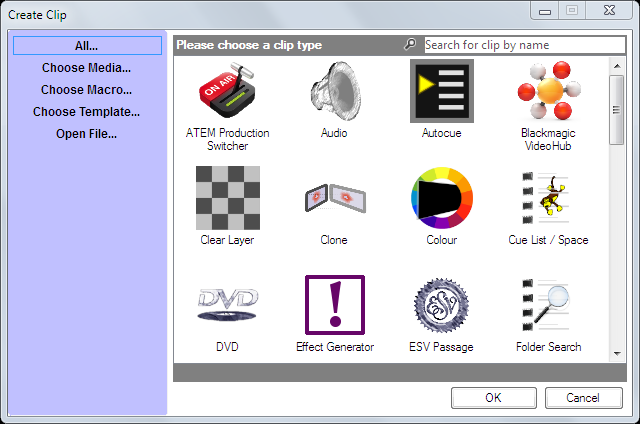
Choose the clip type you want to add and click OK. You can also double click the icon to bypass clicking OK. Refer to the Clip Types and Macros sections of this documentation for more details.
2. File Chooser
Another way of creating clips is to select several media files you want to add and let Screen Monkey work out what clip type should be created. Start by clicking on an empty slot to open the Create Clip dialog then choose ‘Open File...’ from the left hand panel.
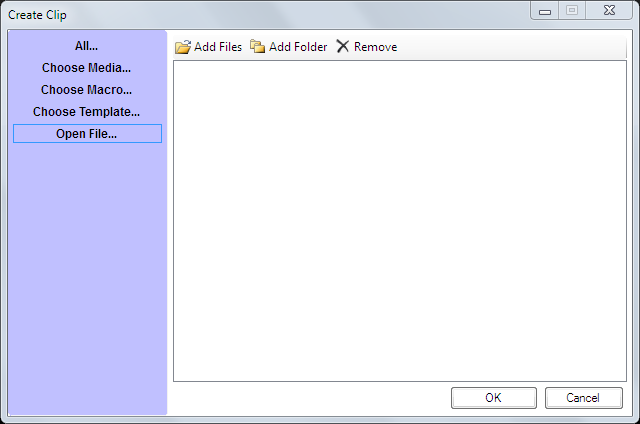
Click ‘Add Files’ or ‘Add Folder’ and select the files you wish to use. Continue adding files until you have everything you require. The files can be of any type supported by Screen Monkey. You can keep adding from different folders or drives by clicking ‘Add Files’ or ‘Add Folder’ again.
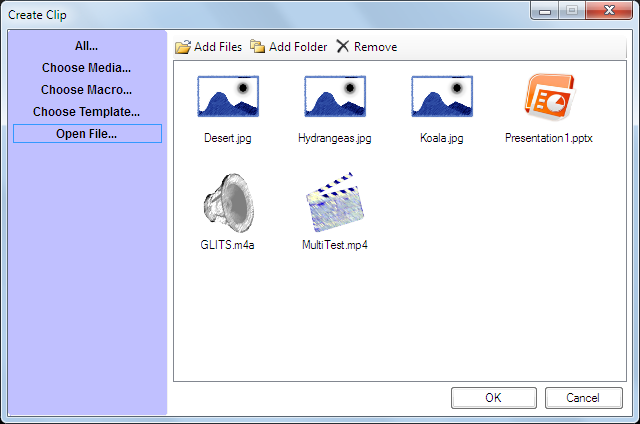
When you add files the icon will indicate what clip type will be created. Click OK to confirm you want to create the clips. The clips will be created on the dashboard in the order that the files were added.
3. Drag-Drop
Another way to create clips is to open the Windows file Explorer, locate an image, video, sound clip, PowerPoint etc, then click and drag the file and drop it onto an empty clip slot.
You may also drop multiple files into Screen Monkey to quickly load lots of clip files. When you drop multiple files Screen Monkey will only load files which it supports. The files will be loaded in adjacent slots unless that slot is already occupied.
4. Clip Template
Create a clip based on a saved template.
Do more with clips
Adding clips is just the start, you can create very complex and highly automated shows. Learn more about links, transitions, effects and schedules. Right click on any clip to bring up a menu of options for modifying all aspects of the clip.
Moving Clips
Use Edit mode to move clips around the dashboard.
Inserting Clips
Clips are inserted by simply by dragging them over the top of an existing clip. When you do this, the clips will be shifted along to make space for the inserted clip.
Playing Clips
After you have added clips to slots you’re ready to play the show. To play a clip, find the clip you want to play and left-click once on it. The clip border turns white to indicate the clip is running and the layer preview thumbnail at the left of the dashboard is updated.
To play a different clip, simply left-click on it and it will play.
Pausing a Clip
Clip types such as video and audio may be paused while they are playing. This will cause the clip to stop playing and freeze at its current frame. To pause a clip, left-click the clip slot while the clip is running.
This can be an extremely useful feature to help you cue video and have it ready for immediate play. Perhaps you want to start and pause a video right at the beginning so that as soon as it’s needed, you are ready to begin playing the video.
To accomplish this, double-click the clip instead of single clicking. The first click will instruct Screen Monkey to play the video and the second will pause it. This means that when you single-click again the video will begin playing instantly with no delay as the video loads.
Play State Indicators
Some clip types will display an indicator to tell you what the current state of the clip is. A video clip may be playing, paused or stopped. To tell you which state the video is in a little icon appears in the top right of the clip panel.
 |
 |
 |
|---|---|---|
| Playing | Paused | Stopped |
Rewind during Live Playback
You may wish to rewind a clip back to the beginning while the clip is live. This may happen if you accidentally play the clip early and you want to play the clip from the beginning. Or perhaps the clip has finished playing and you want to play it again.
To rewind a clip, press and hold the Ctrl key while left-clicking the running clip. The clip will then rewind back to the start, whatever play state it is in.
Repairing Clips
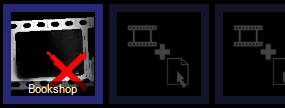
Sometimes your clip media will be on a removable drive or you may have had to move the media files. If this occurs, Screen Monkey will fail to find the files required to load a clip. This is indicated by an event in the event log and the clip thumbnail will present an error image as shown below.
When this happens you can use the repair clip or repair media tools to tell Screen Monkey where the files have been moved to.
To repair a single clip, click it as if you where going to play it. Screen Monkey prompts to ask if you want to attempt to repair the clip.

Click yes and the clip will attempt to repair itself. In some cases you are presented with a file browser dialog that allows you to locate the missing file or folder. The clip type determines the action taken to try and repair a clip. Once you have repaired the clip it should re-load and be usable as a normal clip again.
If you need to repair lots of clips then the repair media tool will save you time.
Not all clip types support repairing. If the clip does not support repairing, Screen Monkey will inform you.
